ImageSurfer Tutorial: Dendritic Spines
Data Set and Source
This data is from Alain Burette at Richard Weinberg’s laboratory at the University of North Carolina at Chapel Hill. The DiO data shows the stained membrane of a dentrite, with spines coming out of it. The PMCA2 data set shows where calcium channels are. Unzip the data (imagesurfer_dendritic_spines) to a directory of your choosing. To load a data set, click File -> Load -> Image Sequence, click Browse... in the newly opened load dialog, and navigate to the directory containing your data. To load the DiO data, filter out all of the non-DiO files by typing ‘dio’ into the ‘Filenames must contain’ text box. Click Load. Repeat this process for the PMCA2 data set, using ‘pmca’ as the filter text this time.
Recommended Viewing Procedure
Once you have both the DiO and PMCA2 data sets loaded separately, they will both appear in the Dataset drop-down box in the Dataset tab of the ImageSurfer window. Make sure that you have the DiO data set selected in that box.
On the Volume tab of the ImageSurfer window, set the voxel height to 3 to get the aspect ratio of the voxels to better approximate the actual ratio. We will now produce an isosurface of the DiO data set colored by the PMCA2 data set. To do this, be sure you have the DiO data set selected in the Dataset tab, then set the value of the Render Style drop-down box to ‘Colored Isosurface’. Change the ‘Scalar’ drop-down box to the PMCA2 data set. Set the isovalue of the surface to 75 either by sliding the ‘Isovalue’ slider or typing into the text box next to the ‘Isovalue’ slider. Finally, click ‘Apply Changes’.


You can now interact with the 3D visualization in the Volume window. To rotate the camera, left-click the window and drag with the mouse. To zoom the camera, right-click the window and drag with the mouse. To pan the camera, middle-click the window and drag with the mouse.
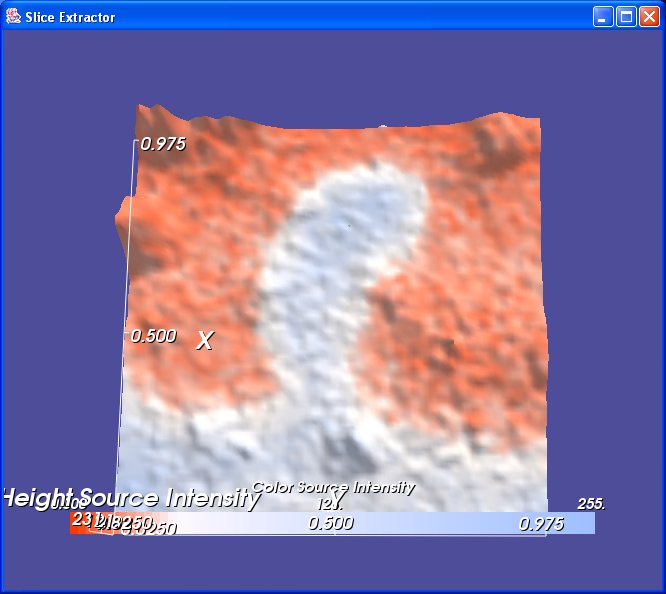
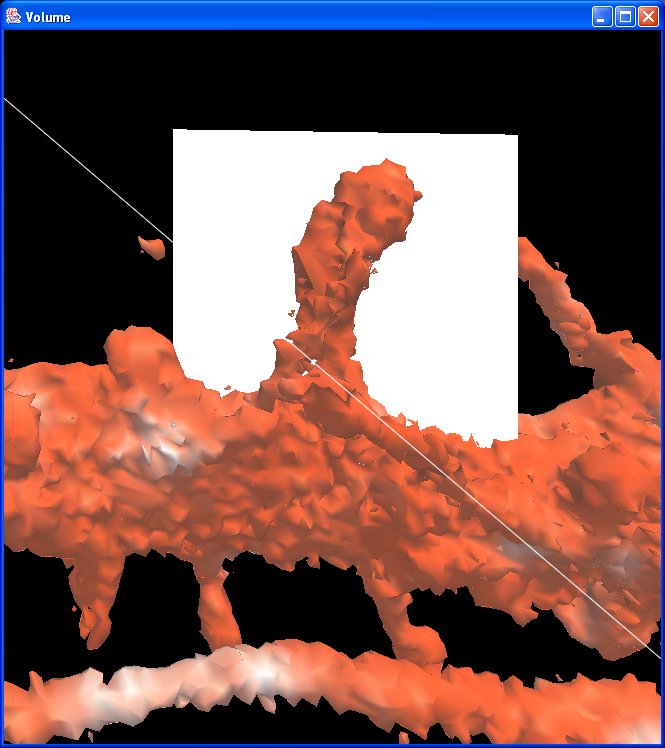
Next we will capture a 2D slice of the data through a dendritic spine using the slice plane. In the Volume tab, check ‘Move Slice Extractor’. In the 3D window, you can now interact with the white slice plane. Left-click and drag to rotate the slice plane. Right-click and drag to scale the slice plane. Middle-click and drag to translate the slice plane. Orient the slice plane such that it is cutting through one of the dendritic spines, as shown in the figure on the right. In the Slice tab of the Imagesurfer window, set the Height Scale to .1, set the Height Field to the PMCA2 data set, set the Color Field to the DiO data set, and click ‘Capture Slice’.”