ImageSurfer 2: Record a Movie
This tutorial shows you how to save movies in ImageSurfer 2.
There are three styles of movies that you can create:
- The observed object spinning around in the center.
- The observed object spinning around in the center with zoom-in and zoom-out effect.
- You define a path in space, and the camera will fly through the path.
If you don’t want to include the orientation axes in the movie, turn them off by following this tutorial.
A spinning object
This style of movie is the easiest one to create. First make sure you have loaded some dataset.
- Click on View > Animation View to bring up the animation editor.
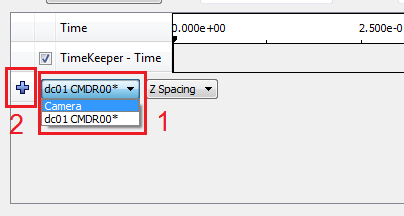
- Choose ‘Camera’ from the drop-down list and click on the blue cross to the left to add the camera to the scene. Click ‘OK’ to accept the default camera position.
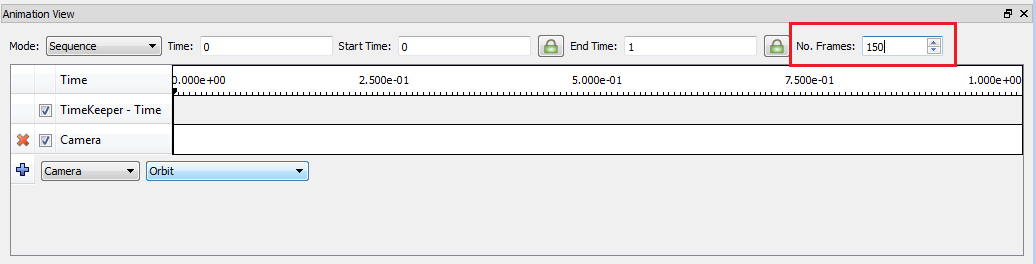
- To the right, change ‘No. Frames’ to 150. This number defines how many shots will be taken during a 360 degree rotation.
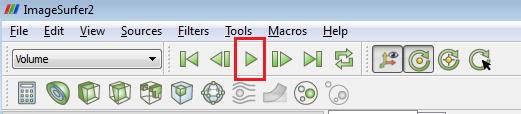
- (Optional) Now you can click the play icon on top of the whole window to get a preview of the movie. Remember to click the ‘Rewind’ icon to rewind the move back to frame 0 after you are done.
- From the menu on the very top, click File > Save Animation. Change ‘Frame Rate (fps)’ from 1.00 to 15 and then click the ‘Save Animation’ button. Give the movie a file name and save it to somewhere. There will be a dialog telling you the movie resolution will be modified a little bit. Just click OK.
- Now your object in ImageSurfer 2 should start spinning, which means the frames in the movie are being recorded.
- After the spinning stops, you will have a ten-second movie with 15 frames per second (fps).
A spinning object with zoom-in and zoom-out effect
A second style of movie is orbiting the camera along a closed circle. The shape of the circle can be modified accordingly.
- Click on View > Animation View to bring up the animation editor.
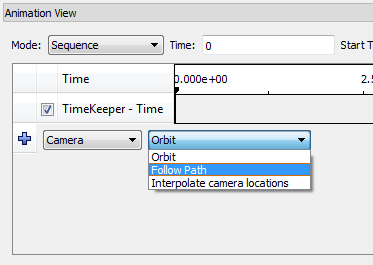
- Choose ‘Camera’ from the first drop-down list in animation editor.
- Choose ‘Follow Path’ from the second drop-down list.
- Click the blue cross button to the left to add the camera to the scene.
- Double click on anywhere within the Camera row (see the image below). It would bring up a dialog.

- Double click on the cell where ‘Path…’ is, and it will bring up another dialog.
- In the dialog, select ‘Camera Position’ in the left list, and go back to see ImageSurfer 2’s rendering screen. You should see a yellow circle appear around your object. If you can’t see the whole circle, use the wheel-scroll to zoom-out.

- The yellow circle is the closed path that the camera will follow. You can modify the shape of the path by dragging the small spheres sitting in the periphery.
- Once you are satisfied with the path, follow the instructions starting from step 3 in the previous section to save a video file.
Camera following a user-defined path
In the last style, you define a path by adding multiple ‘check points’ for the camera to follow. This is also the only way to define a non-loop camera path in ImageSurfer 2.
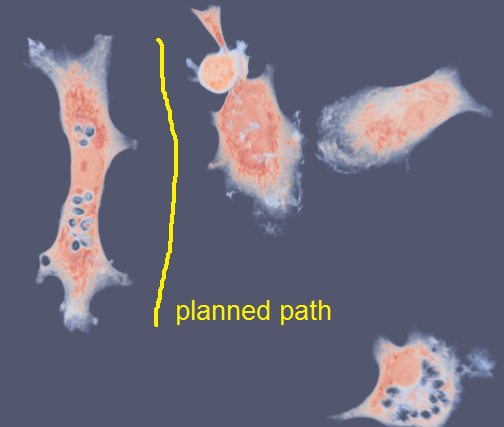
Say I view my data from the up direction in the above image, and the yellow line is the imaginary path that I’d like the camera to follow. Here are the steps to make it happen:
- User mouse to move the camera to the starting point of the path.
- Click on View > Animation View to bring up the animation editor.
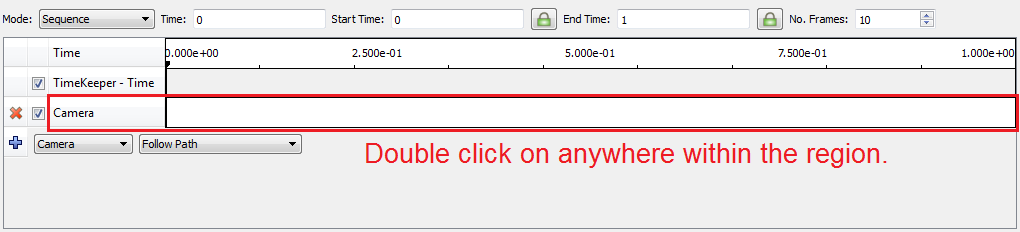
- Choose ‘Camera’ from the first drop-down list in animation editor, and ‘Interpolate camera locations’ from the second drop-down list.

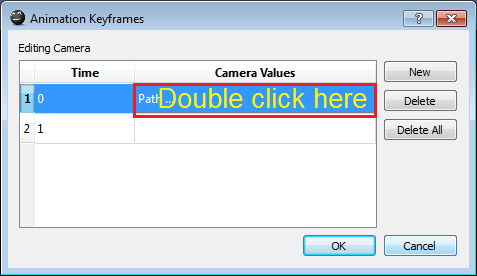
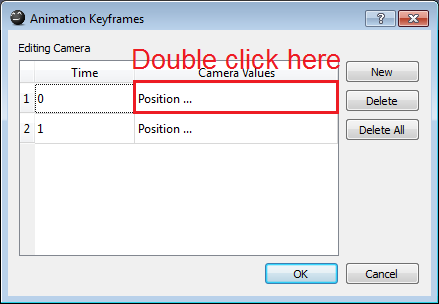
- Double click on anywhere within the Camera row (see the image below). It would bring up a dialog.
- Double click on ‘Position…’ in the first row and it will bring up another dialog.
- Click ‘Use Current’ to set the current camera position to the first point in the path, and click ‘OK’.

- Don’t close the ‘Animation Keyframes’ dialog. Just move it away from the rendering window. We are gonna come back soon.
- Click on ImageSurfer’s rendering window, and use your mouse to have the camera move along the planned path a bit.
- Go back to the ‘Animation Keyframes’ dialog, and this time double clicks on ‘Position …’ in the second row.
- Like we did earlier, click ‘Use Current’ to set the current camera position to the second point.
- Keep moving the camera. After each move, add a new position in the ‘Animation Keyframes’ dialog and set it to the current position.
- After finishing adding all the points, follow the instructions starting from step 3 in the first section to save a video file.