ImageSurfer 2: Isosurface
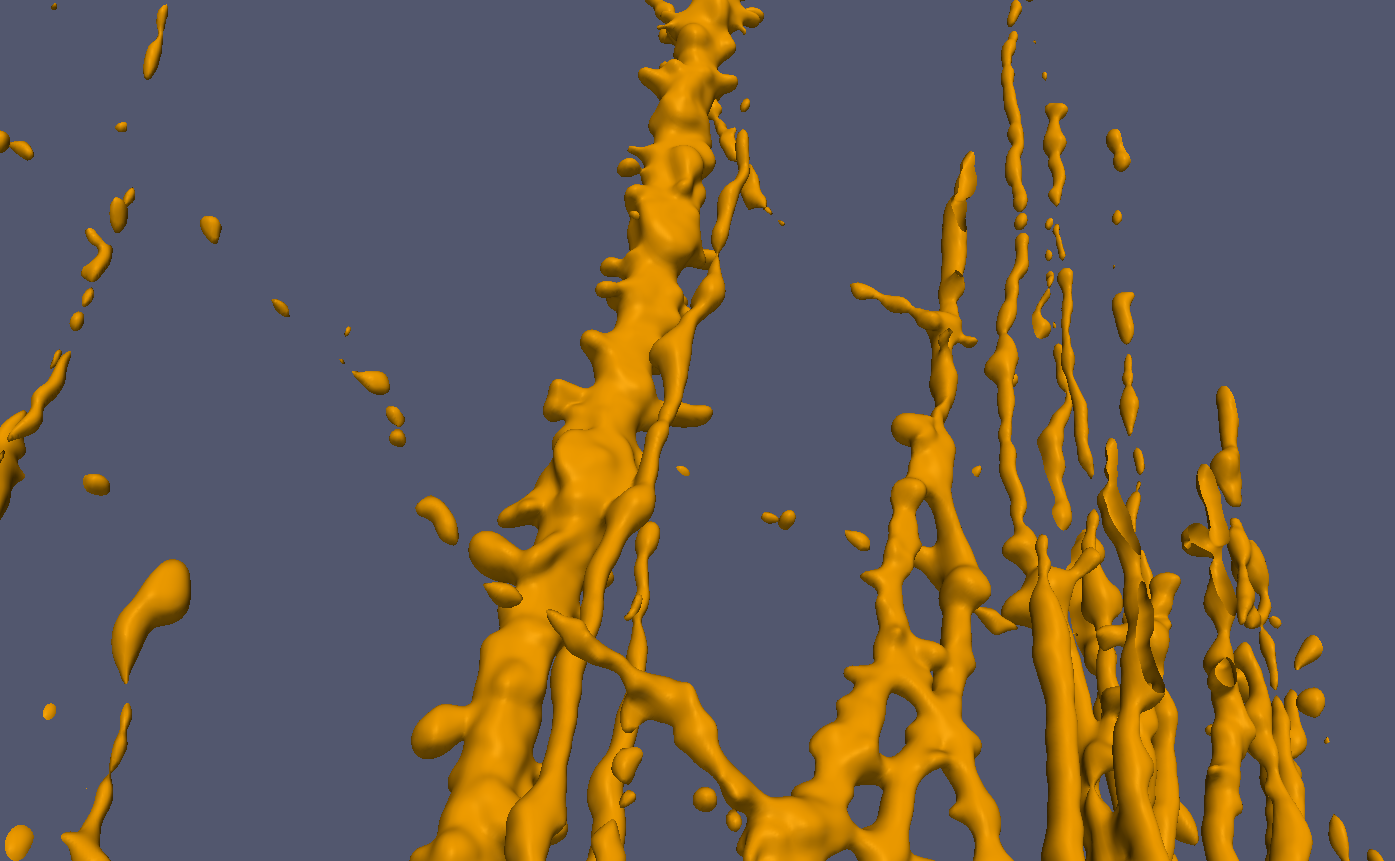
This tutorial teaches you how to visualize data in isosurface in ImageSurfer 2, like in the following picture.
Load Data
We will use the dendritic spine data as an example in this tutorial. Click here if you don’t know how to load it into ImageSurfer 2.
Isosurface
When the dendritic spine data is loaded in ImageSurfer 2, click the ‘contour’ icon above the Pipeline Browser.
![]()
It brings you to the Properties tab.
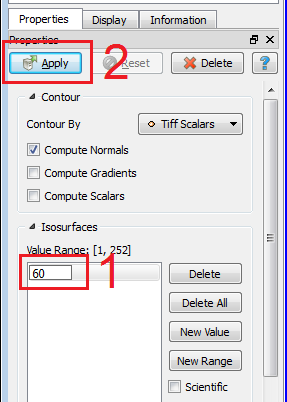
- Double click on the isovalue and change it from 126.5 to 60.
- Click the Apply button.
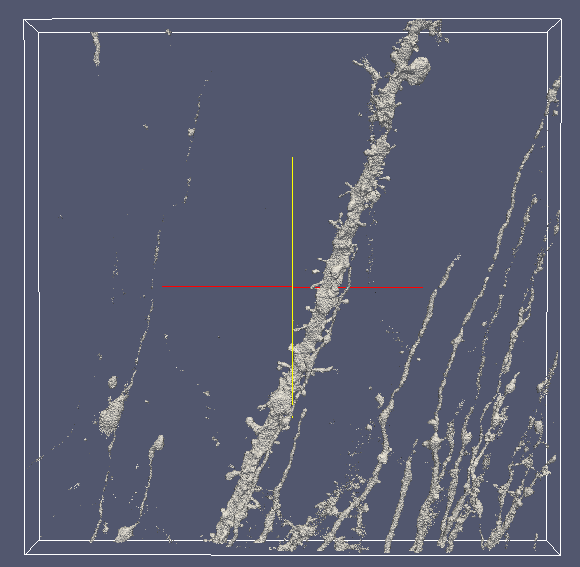
The dendritic spine is now visualized in isosurface now.
Use
- Left mouse button to rotate.
- Right mouse button or the scrolling wheel to zoom-in and zoom-out.
- Middle mouse button to pan.
What is an Isovalue?
An isosurface is a surface of a single value – the isovalue – in a 3D field. Isosurfaces are the 3D analog of a single-valued contour line in a 2D image. Isosurfaces may form closed surfaces enclosing regions of higher or lower value, but not always. Different isovalues produce different isosurfaces, with less or more data. Generally a lower isovalue would include more data in the isosurface, including noise unfortunately. A higher isovalue would eliminate noise, but you’ll see less data. The common situation is you’ll have to try different isovalues to find out which one works best. Notice that in the Property tab, ImageSurfer 2 shows the isovalue range and sets the default isovalue to 50%.
Make an Isosurface Smoother
To make an isosurface smoother, we used two filters in this tutorial:
- Median filter: replaces each voxel with the one having the median value from a rectangular neighborhood around that voxel.
- Gaussian filter: blurs image with a Gaussian function at a user-defined scale sigma.
Median Filter
- In the Pipeline Browser, select dio.*, which is the original image data on which we will apply filters.
- In the top menu, select Filters > Alphabetical > Median. Change Kernel Size from 1, 1, 1 to 3, 3, 3, and click Apply.
- That’s it for median filter. We will then apply a gaussian filter.
Gaussian Filter
- In the Pipeline Browser, select Median1.
- From the top menu, select Filters > Alphabetical > Gaussian Image Blur, and hit Apply.
You won’t see the isosurface change since the one on screen is created from the original images. To generate a new isosurface from the images that were processed via the two filters,
- In the Pipeline Browser, select GaussianImageBlur1.
- On the toolbar, click the Contour icon. Change the Isovalue like we did before, but this time make it 35 , and click Apply.
- In the Pipeline Browser, hide the old isosurface by clicking on the eye icon left to Contour1.

Change Isosurface color
- In the Pipeline Browser, select Contour2, the isosurface we just created.
- In the panel below, switch to the Display tab and click Set Solid Color….
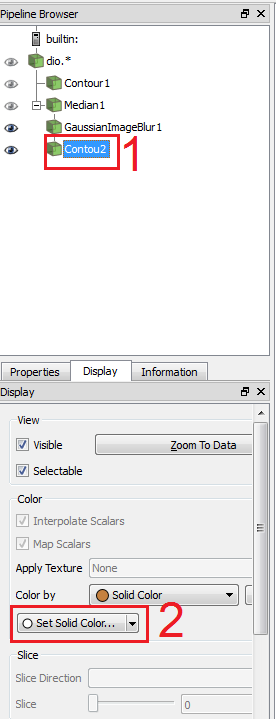
Choose a color for your isofurface.