ImageSurfer 2: Create shadow
This tutorial is going to show you how to create shadow in ImageSurfer.
In this example, I am going to use a build-in model just for the demo, but the same steps can be applied to your own data later.
1. From the top menu, click Sources -> Wavlet and then click the Apply button.
- Contour icon, and then the
- Apply button

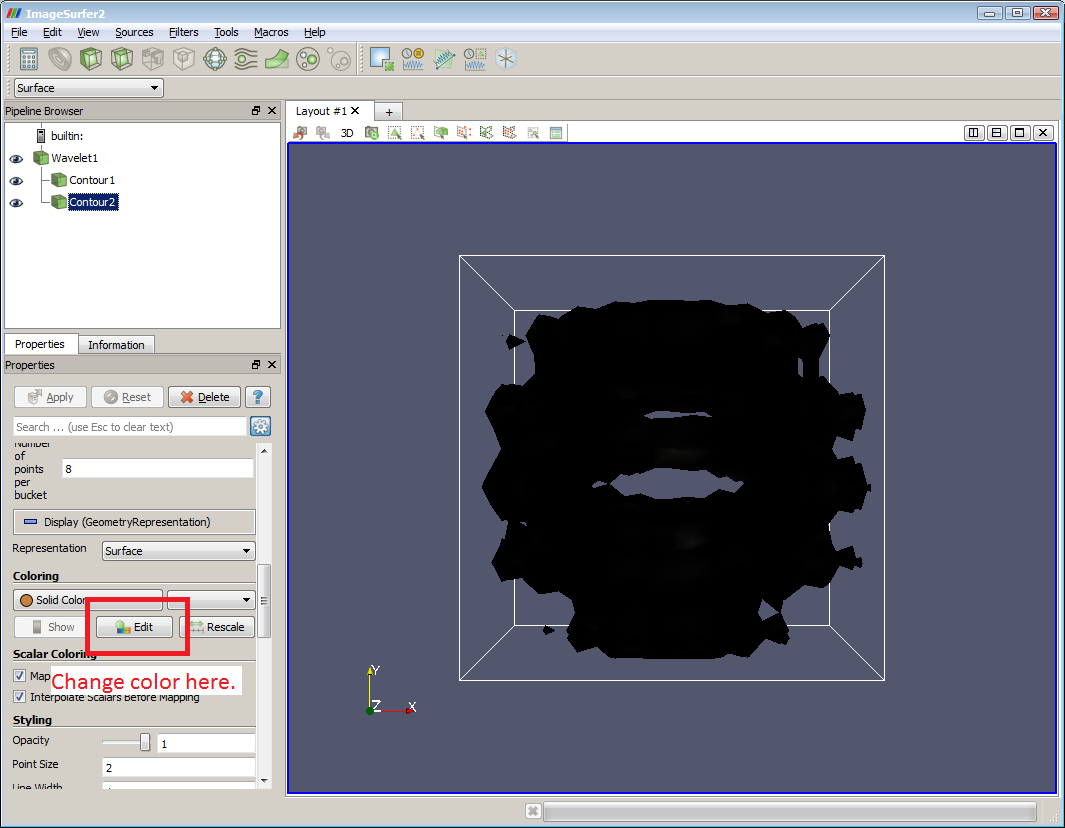
4. With Contour2 selected, Scroll down in the Property panel and click the Edit button and change the color to black.
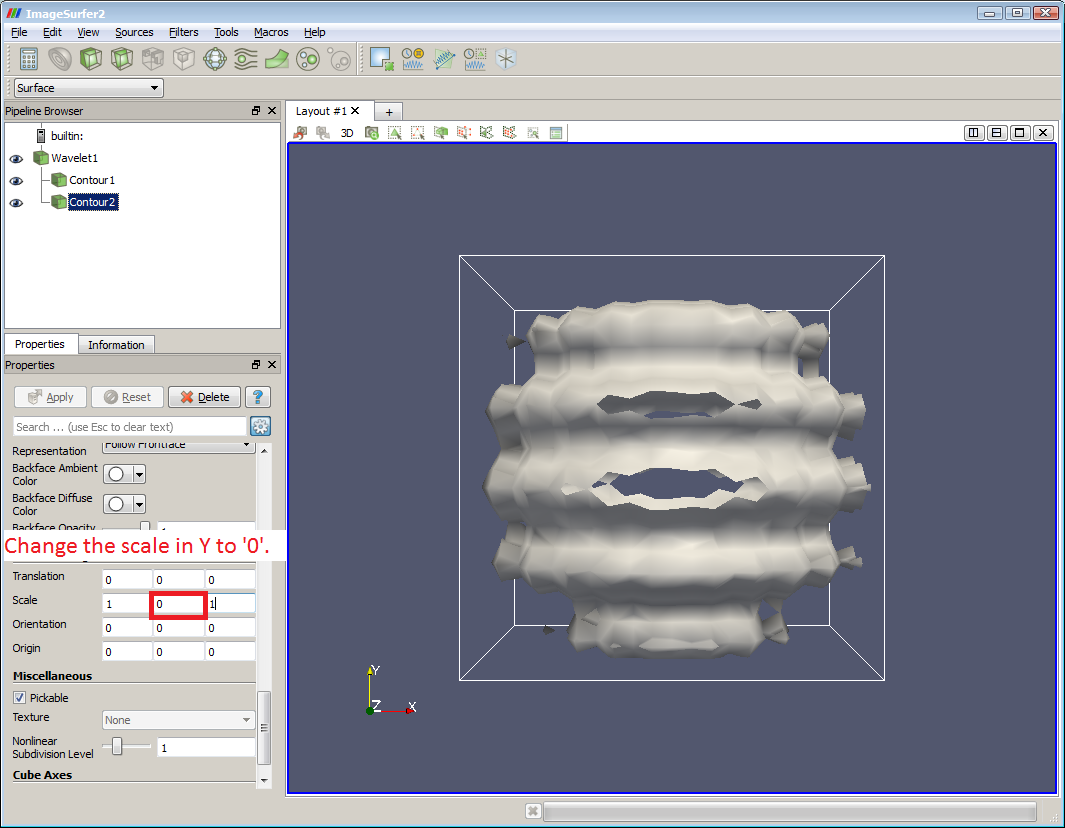
5. Scroll down a little further, change the 2nd field in Scale to zero.
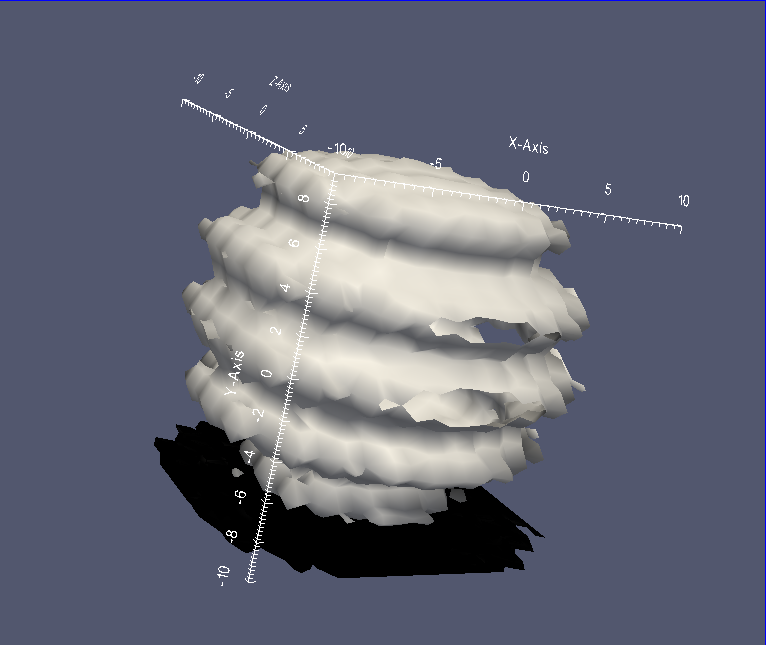
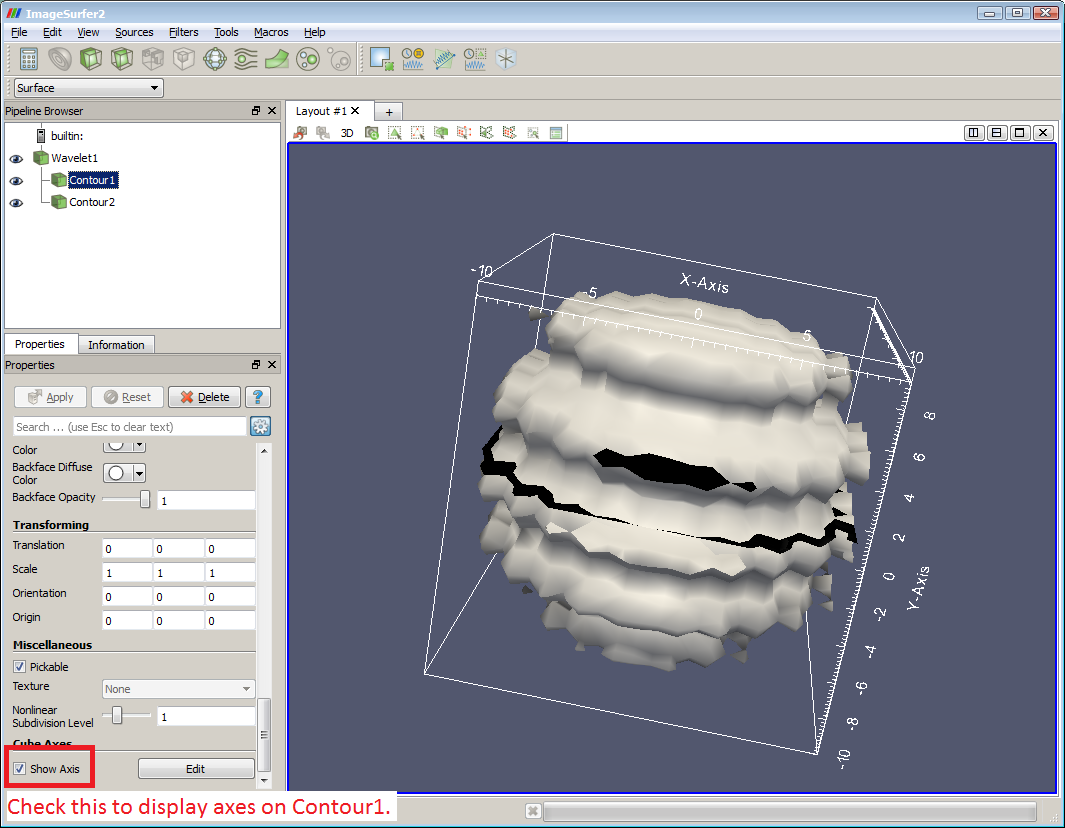
6. If you rotate the model, you’ll see Contour2 is now just a flat surface in the middle. Now we need to move it down to the bottom so it looks like shadow. The last thing we need to know is how much space to move. First select Contour1 in the pipeline, and then check ‘Show Axis’, which is sitting at the bottom of the Property panel. The axes on the screen tell us the dimensions of the data. What we need is the dimension in Y. In this example, the values range from 10 to -10.
7. Select Contour2. In the Transforming section, enter -10, which is a value we figured out in step 6, in the 2nd box (Y axis) of Translation. Doing this will bring down the shadow by 10 units, which is the boundary at the bottom.
